
SMA Bahasa Inggris: Pertanyaan, Jawaban, Latihan Soal & Pembahasan
Urutkan
Bella B
30 Juni 2022 01:31

8

Diandra D
30 Juni 2022 01:31
1
Jongdi J
30 Juni 2022 01:31
1
Okedia O
30 Juni 2022 01:31
1
Bella B
30 Juni 2022 01:31
2
Diandra D
30 Juni 2022 01:31
1
Jongdi J
30 Juni 2022 01:30
3
Okedia O
30 Juni 2022 01:30
31
Bella B
30 Juni 2022 01:30
1
Diandra D
30 Juni 2022 01:30
1
We should not preheat skillet over ____ to avoid scorch.
Pembahasan:
1
0.0
Read the text aloud.
Then, answer the questions that follow.
Chicken Wraps
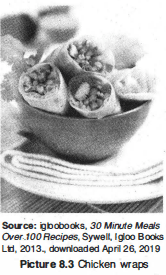
Ingredients:
- 45 ml olive oil
- 8 flour tortillas
- 1 green pepper, sliced
- 2 tomatoes, peeled and sliced
- salt and pepper
- 2 chicken breast, skinned and sliced
- 1 red pepper, sliced
- 2 carrots, sliced
- 1 lemon, juiced
Steps:
- Heat the oven 200°C ( 1 80° fan), 400°F, gas 6.
- Heat the oil in a frying pan. Season the chicken with salt and pepper and fry for 5 minutes, stirring occasionally, until the chicken is cooked through. Set aside.
- Warm the tortillas in the oven for a few minutes. Remove from the oven.
- Place the chicken and vegetables on the tortilla, sprinkle over the lemon juice and roll up, tucking the sides. Do to all the remaining.
- Slice the wraps in half and garnish with parsley.
(Adopted from: igloobooks, 30 Minute Meals Over 100 Recipes, Sywell, Igloo Books Ltd, 2013.)
Where do you probably find the text?
Pembahasan:
1
0.0
The following text is for questions 44 to 47.
Chicken Nuggets
Ingredients:
- 4 chicken breasts, skinned
- 300 ml buttermilk
- 200 g breadcrumbs
- 1 tsp mustard powder
- A pinch of cayenne powder
- Salt and freshly ground black pepper
- 100 g plain (all-purpose) flour
- 2 eggs, beaten
- Vegetable oil
- Handful cherry. tomatoes, halved
- Handful rocket (arugula)
- 1 courgette (zucchini)
Methods:
- Bash the chicken breasts between 2 pieces cling film with a rolling pin until about 2 cm thick.
- Cut each piece into thick strips and place in a bowl with the buttermilk. Refrigerate for at least 2 hours or overnight.
- Mix the breadcrumbs with the cayenne, mustard powder, and a little seasoning.
- Dip the cooled chicken pieces one at a time into the flour, then the eggs, and finally the breadcrumbs mix, then lay on a rack to dry slightly.
- Heat 1 cm of oil in a pan and fry the chicken in batches until golden on both sides and cooked through.
- Serve with the tomatoes and rocket, using a vegetable peeler to slice the courgette into ribbons.
(Adopted from: igloobooks, Cook's Kitchen Tasty Chicken over 100 Recipes, Northampton, Igloo Books Ltd. 2015.)
The writer's purpose in writing the text is ____.
Pembahasan:
1
3.0
The following text is for questions 44 to 47.
Chicken Nuggets
Ingredients:
- 4 chicken breasts, skinned
- 300 ml buttermilk
- 200 g breadcrumbs
- 1 tsp mustard powder
- A pinch of cayenne powder
- Salt and freshly ground black pepper
- 100 g plain (all-purpose) flour
- 2 eggs, beaten
- Vegetable oil
- Handful cherry. tomatoes, halved
- Handful rocket (arugula)
- 1 courgette (zucchini)
Methods:
- Bash the chicken breasts between 2 pieces cling film with a rolling pin until about 2 cm thick.
- Cut each piece into thick strips and place in a bowl with the buttermilk. Refrigerate for at least 2 hours or overnight.
- Mix the breadcrumbs with the cayenne, mustard powder, and a little seasoning.
- Dip the cooled chicken pieces one at a time into the flour, then the eggs, and finally the breadcrumbs mix, then lay on a rack to dry slightly.
- Heat 1 cm of oil in a pan and fry the chicken in batches until golden on both sides and cooked through.
- Serve with the tomatoes and rocket, using a vegetable peeler to slice the courgette into ribbons.
(Adopted from: igloobooks, Cook's Kitchen Tasty Chicken over 100 Recipes, Northampton, Igloo Books Ltd. 2015.)
"Dip the cooled chicken pieces one at a time into the flour, ... " (Step 4)
What does the underlined phrase mean?
Pembahasan:
2
0.0
Work in pairs.
Read the following texts & answer the question
Text 1
How to Make a Computer Animation
Just like a flip-book, computer animation is made up of many slightly different pictures. If these are played back quickly, it will give the illusion of movement. The animation software needed for this activity can be downloaded for free from the Internet.
You will need:
- A computer or laptop with animation software
- A digital camera
- A tripod
- An item for animation (a toy car or modeling clay)
Method:
- Prepare an object for animation such as a toy car or modeling clay that you have changed into an object. ·
- Start up the animation software on your computer. Attach your camera on the tripod to the computer via a cable.
- Place your object for animation such as a toy car on a flat surface and frame it so that the front part of the toy car is just peeking into the left-hand side of the picture. Check the image on the computer screen and snap your picture.
- Move the toy car just a little bit so that more of it is in the shot. Your animation software should show a faint outline of the last picture, making easier for you to line up.
- Repeat. Keep moving the object to the right until it disappears out of the shot. Check your progress to make sure everything is going smoothly and reshoot if you make a mistake.
- Playback and enjoy your magical moving toy car. Most animation programs also allow you to add sound and visual to your film.
(Adopted from: John Woodward, Necessary Skills and then Some, New York, Darling Kindersley Limited, 2014).
Text 2
Do you want to learn how to make a simple computer animation? You can make it quite easily. You can use computer animation software to do it. It is just like a flip-book. Computer animation is made up of many slightly different pictures. If these are played back quickly, it will give the illusion of movement. Now, let's make it.
You will need a computer or laptop computer With animation software, a digital camera, a tripod, and an item for animation. You can use a toy car or modeling clay which you made it into an animal such as a snail.
Now follow the instructions. First prepare an object for animation such as a toy car or modeling clay that you have changed into an object. Then, start up the animation software on your computer. Next attach your camera on the tripod to the computer via a cable.
After that, place your object for animation such as a toy car on a flat surface. Frame it so that the front part of the toy car is just peeking into the left-hand side of the picture. Then, check the image on the computer screen and snap your picture. Move the toy car just a little bit so that more of it is in the shot. Your animation software should show a faint outline of the last picture. It makes easier for you to line up. Repeat. Keep moving the object to the right until it disappears out of the shot.
Then, you should check your progress to make sure everything is going smoothly and reshoot if you make a mistake. Finally, playback and enjoy your magical moving toy car. Most animation programs also allow you to add sound and visual to your film.
That's amazing, right? So, have a try!
(Adopted from: John Woodward, Necessary Skills and then Some , New York, Dorling Kindersley Limited, 2014)
What are both of the texts about?
Pembahasan:
1
0.0
Work in pairs.
Read the following texts & answer the question
Text 1
How to Make a Computer Animation
Just like a flip-book, computer animation is made up of many slightly different pictures. If these are played back quickly, it will give the illusion of movement. The animation software needed for this activity can be downloaded for free from the Internet.
You will need:
- A computer or laptop with animation software
- A digital camera
- A tripod
- An item for animation (a toy car or modeling clay)
Method:
- Prepare an object for animation such as a toy car or modeling clay that you have changed into an object. ·
- Start up the animation software on your computer. Attach your camera on the tripod to the computer via a cable.
- Place your object for animation such as a toy car on a flat surface and frame it so that the front part of the toy car is just peeking into the left-hand side of the picture. Check the image on the computer screen and snap your picture.
- Move the toy car just a little bit so that more of it is in the shot. Your animation software should show a faint outline of the last picture, making easier for you to line up.
- Repeat. Keep moving the object to the right until it disappears out of the shot. Check your progress to make sure everything is going smoothly and reshoot if you make a mistake.
- Playback and enjoy your magical moving toy car. Most animation programs also allow you to add sound and visual to your film.
(Adopted from: John Woodward, Necessary Skills and then Some, New York, Darling Kindersley Limited, 2014).
Text 2
Do you want to learn how to make a simple computer animation? You can make it quite easily. You can use computer animation software to do it. It is just like a flip-book. Computer animation is made up of many slightly different pictures. If these are played back quickly, it will give the illusion of movement. Now, let's make it.
You will need a computer or laptop computer With animation software, a digital camera, a tripod, and an item for animation. You can use a toy car or modeling clay which you made it into an animal such as a snail.
Now follow the instructions. First prepare an object for animation such as a toy car or modeling clay that you have changed into an object. Then, start up the animation software on your computer. Next attach your camera on the tripod to the computer via a cable.
After that, place your object for animation such as a toy car on a flat surface. Frame it so that the front part of the toy car is just peeking into the left-hand side of the picture. Then, check the image on the computer screen and snap your picture. Move the toy car just a little bit so that more of it is in the shot. Your animation software should show a faint outline of the last picture. It makes easier for you to line up. Repeat. Keep moving the object to the right until it disappears out of the shot.
Then, you should check your progress to make sure everything is going smoothly and reshoot if you make a mistake. Finally, playback and enjoy your magical moving toy car. Most animation programs also allow you to add sound and visual to your film.
That's amazing, right? So, have a try!
(Adopted from: John Woodward, Necessary Skills and then Some , New York, Dorling Kindersley Limited, 2014)
What should you prepare to do the procedure?
Pembahasan:
3
0.0
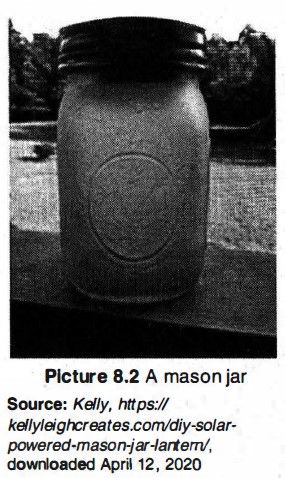
Are you planning a camping trip with your family or friends? Do you like to stay up late in the tent? And, you don't want to bother with flashlight batteries that die, do you? Then, this DIY solarpowered mason jar lantern is for you! This project is so easy and cheap and will keep your campsite, or any area, illuminated with style.
All you need to make this solar powered lantern is a mason jar and a solar powered light from the dollar store. Frosted spray paint is optional You'll also need scissors, a drill and hot glue. Now, let's start making it. First; carefully take apart the solar powered light; making sure to keep the whole solar powered contraption in place. Cut the plastic, part away so you are left with only the solar powered panel.
After that; cut a square hole in the lid of the mason jar to fit the solar powered panel. Use a drill to start several holes, so you can get the scissors through the metal. Secure the panel with hot glue.
You can put the glue on the outside or the underside. If you put it on the underside, it looks less messy than the outside does. Hot glue the underside portion to the base, so it doesn't hang down into your mason jar. So now, you will have the solar panel on the bottom. Don't forget to hot glue each end of the battery and stick it to the solar panel.
Next; screw the lid back onto the mason jar to complete your lantern. The solar powered mason jar lantern is done! You can either leave the lantern as it is or you can frost the outside of the mason jar. Frosting the outside diffuses the light a bit; and I think it looks better frosted.
This lantern lasts all night if you let it charge up during the day. Just put it on your picnic table and you will have a fun nightlight to take in the tent at bedtime.
(Adopted from: Kelly, https:/ /kellyleighcreates.com/diy-solar-ppwered-mason-jar-lantern/ (April 12, 2020))
Answer the following questions based on the text in Activity 3. Share your answers with the class.
How many tools do we need to make the lantern? What are they?
Pembahasan:
1
0.0
Are you planning a camping trip with your family or friends? Do you like to stay up late in the tent? And, you don't want to bother with flashlight batteries that die, do you? Then, this DIY solarpowered mason jar lantern is for you! This project is so easy and cheap and will keep your campsite, or any area, illuminated with style.
All you need to make this solar powered lantern is a mason jar and a solar powered light from the dollar store. Frosted spray paint is optional You'll also need scissors, a drill and hot glue. Now, let's start making it. First; carefully take apart the solar powered light; making sure to keep the whole solar powered contraption in place. Cut the plastic, part away so you are left with only the solar powered panel.
After that; cut a square hole in the lid of the mason jar to fit the solar powered panel. Use a drill to start several holes, so you can get the scissors through the metal. Secure the panel with hot glue.
You can put the glue on the outside or the underside. If you put it on the underside, it looks less messy than the outside does. Hot glue the underside portion to the base, so it doesn't hang down into your mason jar. So now, you will have the solar panel on the bottom. Don't forget to hot glue each end of the battery and stick it to the solar panel.
Next; screw the lid back onto the mason jar to complete your lantern. The solar powered mason jar lantern is done! You can either leave the lantern as it is or you can frost the outside of the mason jar. Frosting the outside diffuses the light a bit; and I think it looks better frosted.
This lantern lasts all night if you let it charge up during the day. Just put it on your picnic table and you will have a fun nightlight to take in the tent at bedtime.
(Adopted from: Kelly, https:/ /kellyleighcreates.com/diy-solar-ppwered-mason-jar-lantern/ (April 12, 2020))
Answer the following questions based on the text in Activity 3. Share your answers with the class.
What do we use the hot glue for?
Pembahasan:
1
0.0
Are you planning a camping trip with your family or friends? Do you like to stay up late in the tent? And, you don't want to bother with flashlight batteries that die, do you? Then, this DIY solarpowered mason jar lantern is for you! This project is so easy and cheap and will keep your campsite, or any area, illuminated with style.
All you need to make this solar powered lantern is a mason jar and a solar powered light from the dollar store. Frosted spray paint is optional You'll also need scissors, a drill and hot glue. Now, let's start making it. First; carefully take apart the solar powered light; making sure to keep the whole solar powered contraption in place. Cut the plastic, part away so you are left with only the solar powered panel.
After that; cut a square hole in the lid of the mason jar to fit the solar powered panel. Use a drill to start several holes, so you can get the scissors through the metal. Secure the panel with hot glue.
You can put the glue on the outside or the underside. If you put it on the underside, it looks less messy than the outside does. Hot glue the underside portion to the base, so it doesn't hang down into your mason jar. So now, you will have the solar panel on the bottom. Don't forget to hot glue each end of the battery and stick it to the solar panel.
Next; screw the lid back onto the mason jar to complete your lantern. The solar powered mason jar lantern is done! You can either leave the lantern as it is or you can frost the outside of the mason jar. Frosting the outside diffuses the light a bit; and I think it looks better frosted.
This lantern lasts all night if you let it charge up during the day. Just put it on your picnic table and you will have a fun nightlight to take in the tent at bedtime.
(Adopted from: Kelly, https:/ /kellyleighcreates.com/diy-solar-ppwered-mason-jar-lantern/ (April 12, 2020))
Answer the following questions based on the text in Activity 3. Share your answers with the class.
What should we do after sticking the panel on the bottom of the lid?
Pembahasan:
1
0.0
4. How long do we need to mix the beef with other ingredients?
Pembahasan:
1
0.0

RUANGGURU HQ
Jl. Dr. Saharjo No.161, Manggarai Selatan, Tebet, Kota Jakarta Selatan, Daerah Khusus Ibukota Jakarta 12860
Coba GRATIS Aplikasi Roboguru

Coba GRATIS Aplikasi Ruangguru


Produk Ruangguru
Bantuan & Panduan
Hubungi Kami


Ikuti Kami


©2026 Ruangguru. All Rights Reserved PT. Ruang Raya Indonesia