
SMA Bahasa Inggris: Pertanyaan, Jawaban, Latihan Soal & Pembahasan
Urutkan
Jongdi J
30 Juni 2022 01:30

2

Okedia O
30 Juni 2022 01:30
1
Bella B
30 Juni 2022 01:30
4
Diandra D
30 Juni 2022 01:30
1
Jongdi J
30 Juni 2022 01:30
3
Okedia O
30 Juni 2022 01:30
1
Bella B
30 Juni 2022 01:30
10
Diandra D
30 Juni 2022 01:30
3
Jongdi J
30 Juni 2022 01:30

1
Okedia O
30 Juni 2022 01:30
5
6. What type of text is it?
Pembahasan:
1
0.0
10. What do you usually put in a humberger beside the meat?
Pembahasan:
1
0.0
1. What do you need to make hamburger?
Pembahasan:
2
0.0
3. How many hamburger buns do we need for each hamburger?
Pembahasan:
1
0.0
2. Do we have to put herbs and spices?
Pembahasan:
5
0.0
If the vegetable garden has no easy access, we will ____
Pembahasan:
1
0.0
Arrange the sentences into a good procedure text.
Pembahasan:
1
0.0
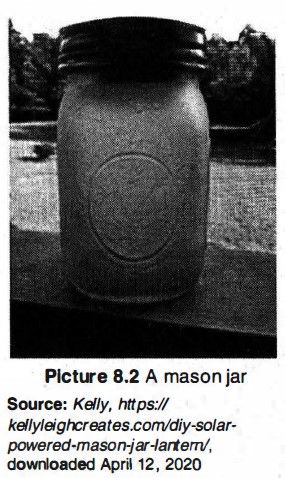
Are you planning a camping trip with your family or friends? Do you like to stay up late in the tent? And, you don't want to bother with flashlight batteries that die, do you? Then, this DIY solarpowered mason jar lantern is for you! This project is so easy and cheap and will keep your campsite, or any area, illuminated with style.
All you need to make this solar powered lantern is a mason jar and a solar powered light from the dollar store. Frosted spray paint is optional You'll also need scissors, a drill and hot glue. Now, let's start making it. First; carefully take apart the solar powered light; making sure to keep the whole solar powered contraption in place. Cut the plastic, part away so you are left with only the solar powered panel.
After that; cut a square hole in the lid of the mason jar to fit the solar powered panel. Use a drill to start several holes, so you can get the scissors through the metal. Secure the panel with hot glue.
You can put the glue on the outside or the underside. If you put it on the underside, it looks less messy than the outside does. Hot glue the underside portion to the base, so it doesn't hang down into your mason jar. So now, you will have the solar panel on the bottom. Don't forget to hot glue each end of the battery and stick it to the solar panel.
Next; screw the lid back onto the mason jar to complete your lantern. The solar powered mason jar lantern is done! You can either leave the lantern as it is or you can frost the outside of the mason jar. Frosting the outside diffuses the light a bit; and I think it looks better frosted.
This lantern lasts all night if you let it charge up during the day. Just put it on your picnic table and you will have a fun nightlight to take in the tent at bedtime.
(Adopted from: Kelly, https:/ /kellyleighcreates.com/diy-solar-ppwered-mason-jar-lantern/ (April 12, 2020))
Answer the following questions based on the text in Activity 3. Share your answers with the class.
What are main items we should prepare to make the lantern?
Pembahasan:
1
0.0
Complete the following statements based on the text in Activity 15.
The writer's purpose in writing the text is ....
Pembahasan:
4
0.0
Answer the following questions clearly and correctly!
If the ground is hard, clay, and rocky, it may be a struggle to install fence posts as well as some types of ground stakes. Here are tips for installing line posts in rocky or hard terrain: The easiest method for driving in ground sleeves and fence posts is·to use a post-pounder to create a small hole. As long as the rocks are not solid bedrock, the post-pounder will help push the sleeves into the ground. Soften the soil by digging pilot holes 6-10 inches deep, then fill each with water using a home garden hose. Using a shovel to dig holes always helps, as well: Keep these tips in-mind when installing deer fence posts.
According to the text, what are the uses of hose and the shovel?
Pembahasan:
1
5.0

RUANGGURU HQ
Jl. Dr. Saharjo No.161, Manggarai Selatan, Tebet, Kota Jakarta Selatan, Daerah Khusus Ibukota Jakarta 12860
Coba GRATIS Aplikasi Roboguru

Coba GRATIS Aplikasi Ruangguru


Produk Ruangguru
Bantuan & Panduan
Hubungi Kami


Ikuti Kami


©2026 Ruangguru. All Rights Reserved PT. Ruang Raya Indonesia